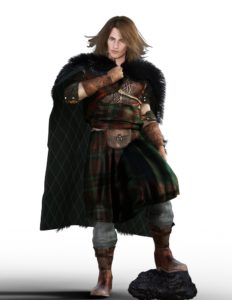
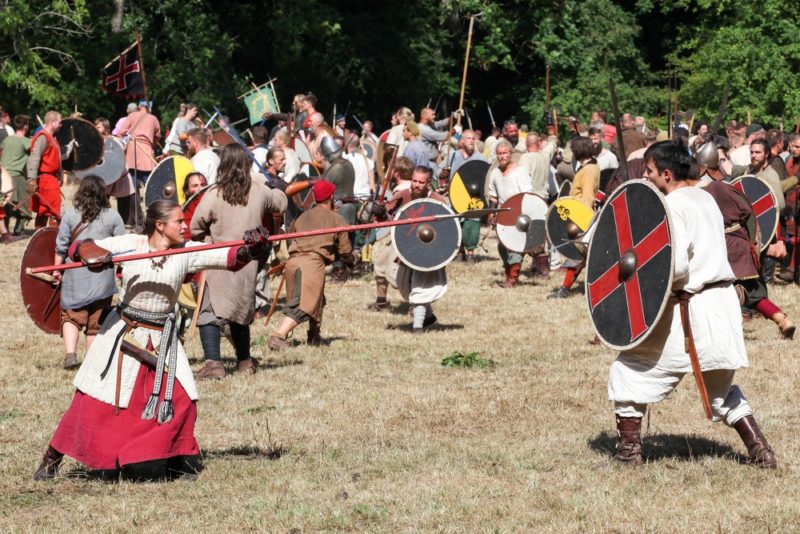
A Viking cloak is one of the simplest cloaks resembling early period costumes. These were adorned by both women plus men and date back to the sixth century. When Christianity became more significant, women began wearing long Viking cloaks fastened in the front with a brooch.
Furthermore, a rectangular wool cloth in a standard weave or a herringbone twill is all you need to make a Viking cloak at home. The size of the piece should be around 2m x 1m or “two thumb ells by four thumb ells, as the Vikings would say.
If you want to make cloaks for your kids you can use less material. People who have no idea what Viking clothing looks like should check out some examples on our site.
No-Sew Viking Cloaks
The most superficial finish for a Viking cloak is to frill the end, especially if sewing isn’t for you. Start by pulling the threads one by one and leave the hem (uncut sides) of your length of wool alone. This process is rather time-consuming but should require no alterations and can be washed easily.
Another option is to use very heavyweight wool, fabric, fur, or linen that can be washed with hot water until it won’t fray. This requires a very close-weave material to work, so it’s good to be aware that this process doesn’t always result in success.
Sewing the Edge of Your Viking Outfit
Another simple design for your cloaks is to roll the raw edges under each other twice. After the folding is complete, stitch the pieces together with a decorative stitch from the Viking period.
You can check out the feather stitch, herringbone stitch, and whip stitch if you are looking for examples.
Trimmed Viking Cloak
The people who could afford it would use tablet woven braid to trim the edges of their clocks. You can sometimes find someone at events or online who makes lengths of the plat by hand, at a cost, of course.
If you are looking for the cheapest way to make a Viking cloak, doing it yourself with materials such as silk, linen, or wool is recommended.
Before beginning, you will need at least 2 -3m of braid, depending on the length of your cloak’s raw edges. Here are a few steps to trimming your Viking cloaks:
- First, fold the raw edges of your cloak
- Leave some fabric overhang at each end, pin your trim down over the raw edge, matching one edge of your braid to the fold
- Fold the overhanging raw ends of your braid under (between the braid and the cloth edge), and whip stitch in place
- Whip stitch the edge of your braid to the folded end of your cloak’s fabric
- Now go to the other side and whip stitch it to the raw ends of the fabric
- Repeat two to five times with a different length of braid at the other end of the cloak
By following the above guidelines, you can be on your way to making cloaks that are the perfect shoulder width and have a hood.
How to Pick a Single Solid Color for Your Cloak
Any fabric that is either undyed or dyed can be used for a cloak, as long as it has a consistent color. Choose dark or light brown fabrics in color if you want a more natural look. Selecting colors like solid blues and reds are ideal if you want a cloak that makes you appear like you have more power and wealth.
How to Find a Long Viking Cloak
Finding a cloak that hangs to your knees and is the length of your arm span will be the most comfortable. Hold the cloak by the top corners and spread it out, then lift the clock up to shoulder-level by outstretching your arms.
It is too large if the cloaks still hang loosely or bunches up. While holding the cloak, ensure that the bottom reaches down to your knees; otherwise, it may end up looking too short when you wear it.
- It’s okay to get a cloak that passes your waist if you prefer a shorter look
- If the cloak is too long, then it will drag along the ground and get dirty after you wrap it
What About a Viking Prince Cloak?
Suppose you want to look like a Viking prince; you can make your Viking outfit look even fancier by sewing knot patterns into the chest area. Another way to spice up the look is to use fur instead of lower-quality fabrics.
Incorporating designs into the hood or attaching a victory pin is a sure-fire way to draw more attention with your Viking cloak. Use embroidered knotwork designs and silk embellishments around the edges to create an eye-catching cloak that you love to wear.
If you cannot afford to buy or don’t get real fur in your country, it is possible to use a faux counterpart to line your jacket inside to keep you warm.
Other Embellishments Using Linen Thread
There is a host of anamorphic Viking cloak knotwork designs that you can use to cover your cloak in. Back in the day, this was usually performed by outlining the image in light-colored wool or fur, using the wrap and split stitch method.
Sometimes parts of the design were filled in with colored short and long stitches. In order to provide interest around the front of the shoulders, these designs were usually only seen on two corners of the cloak.
Wearing Your Cloak
Viking cloaks are generally worn with some of the wool folded to the outside. The outside flap of the coat is typically covered in beautiful embroidery. Especially if they were tall, men didn’t always fold their Viking cloaks down.
If you wonder how to fasten a cloak, you should look for the circular “penannular” brooch near one of the shoulders.
Conclusion
The perfect size cloak should have an ideal shoulder width and keep you warm in those cold winter months. If you can afford to use fur to create or line your coat, it could make it much more comfortable to wear.
Start today and create your first batch of Viking cloaks for your friends and family.


